
Cleanroom Gowning: Step-by-Step Order and Common Failures

Cleanroom Gowning: Step-by-Step Order and Common Failures
A cleanroom gowning procedure is a controlled sequence for putting on protective garments before entering a cleanroom. Its purpose is to keep particles, fibers, and microorganisms from personnel out of the controlled environment. No single gowning order applies to every facility: the correct sequence depends on the cleanroom's ISO class, whether the process is sterile or non-sterile, and the facility's approved SOP.
This guide explains the general order of operations, why order matters, and the most common gowning failures to avoid. Use it as a starting point, then verify every step against your facility's written SOP before changing anything.
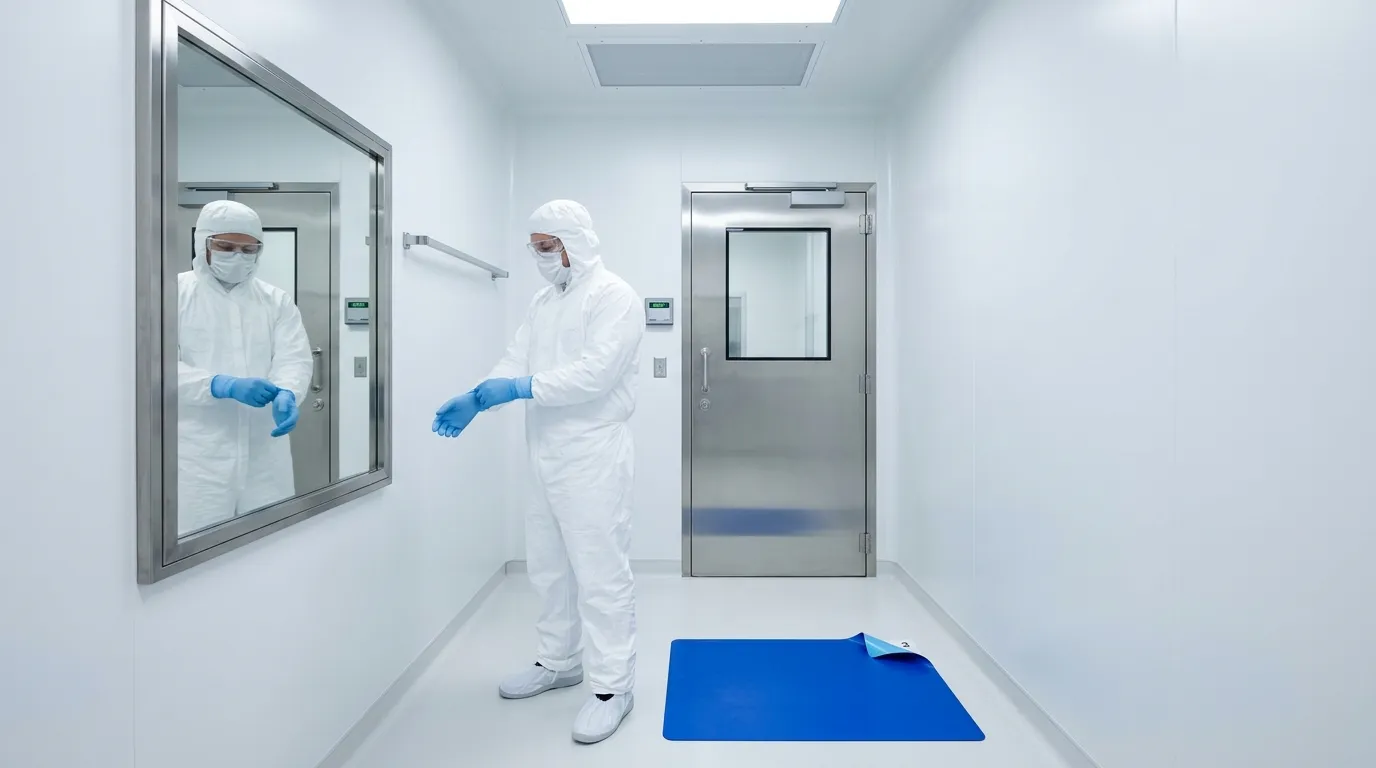
Why the Order of Cleanroom Gowning Matters
People shed skin cells, hair, and clothing fibers, and they release droplets when breathing, talking, or coughing. Without a disciplined sequence, dressing can carry outside contamination into the cleanroom. NASA's cleanroom gowning guidance, for example, treats entry and exit through an anteroom as a controlled procedure for this reason.
The gowning order creates a contamination gradient. Hair and footwear are covered first because they are the dirtiest areas; clean garments are layered over the top; and the cleanest item — the final gloves — is put on last. If an uncovered hand touches a clean garment, or a coverall drags across the floor, the protection is already lost. Gowning rooms reinforce the sequence with step-over benches, sticky mats, and separate dirty and clean zones.
Before You Start: Pre-Entry Preparation
The gowning procedure begins before the first garment is handled. In the change area:
- Remove personal items: jewelry, watches, phones, cosmetics, perfume, and heavy hair products.
- Inspect each garment for tears, stains, loose fibers, or incorrect sizing. Damaged garments must be replaced before use.
- Confirm that the gowning area is clean, organized, and stocked with the garments and gloves needed for the shift.
- Use the sticky mat for cleanroom entrance if one is provided. A sticky mat reduces footwear and cart-wheel contamination before the gowning area, but it does not replace the gowning procedure.
Cleanroom Gowning Sequence Step by Step (General)
The following sequence is a practical general order for non-sterile cleanrooms. Always follow the facility's approved SOP. Sterile environments, specific garment systems, and certain cleanroom classes may require a different order.
Step 1 — Remove Personal Items and Inspect Garments
At the gowning room entrance, do a final check: no jewelry, watches, or cosmetics remain, and every garment is intact and correctly sized. Set aside anything damaged and use a replacement. Never enter the cleanroom with a compromised garment.
Step 2 — Put On Hair and Beard Covers
Cover all hair, including the crown, the sides, and any facial hair. Tuck loose hair inside the cover. Once the hair cover is in place, avoid touching it until the sequence is complete.
Step 3 — Clean Your Hands
Wash and dry your hands thoroughly, or use the sanitizing agent specified by the facility SOP. Hand hygiene is required before handling clean garments and again before donning gloves. After cleaning your hands, do not touch the floor, walls, doors, or personal items.
Step 4 — Put On Shoe or Boot Covers
Put on shoe or boot covers over your footwear. If the facility has a step-over bench, use it so your covered feet do not touch the dirty side after you cross to the clean side. Check that the covers fit securely, and replace them if they slip or tear.
Step 5 — Don the Coverall
Hold the coverall away from your body and above the floor. Step into the legs, pull the body up, and fasten all zippers, snaps, and cuffs. Avoid touching the outside of the coverall with bare hands, and do not let the garment drag across the floor. If the coverall touches the floor, inspect it and replace it if contaminated or damaged.
Step 6 — Don the Face Mask and Hood
Put on the face mask so it fully covers your nose and mouth. Refit it if the seal is loose, and do not pull it down once it is in place. Put on the hood according to the garment system's design. The hood should cover the hair cover and tuck into the coverall collar with no exposed hair or skin.
Step 7 — Put On Final Gloves Last
Gloves are the final item in the gowning sequence. Put them on after all other garments are in place and after any required hand-hygiene step. Avoid touching the outside of the glove with bare skin while pulling them on. Check for tears, punctures, and correct fit. If your facility requires sterile gloves or a second pair, follow the SOP for the specific product and process.
When you need to evaluate glove options, compare cleanroom gloves supplier documentation against the requirements in your SOP.
Clean and Dirty Zones: Touch Discipline During Gowning
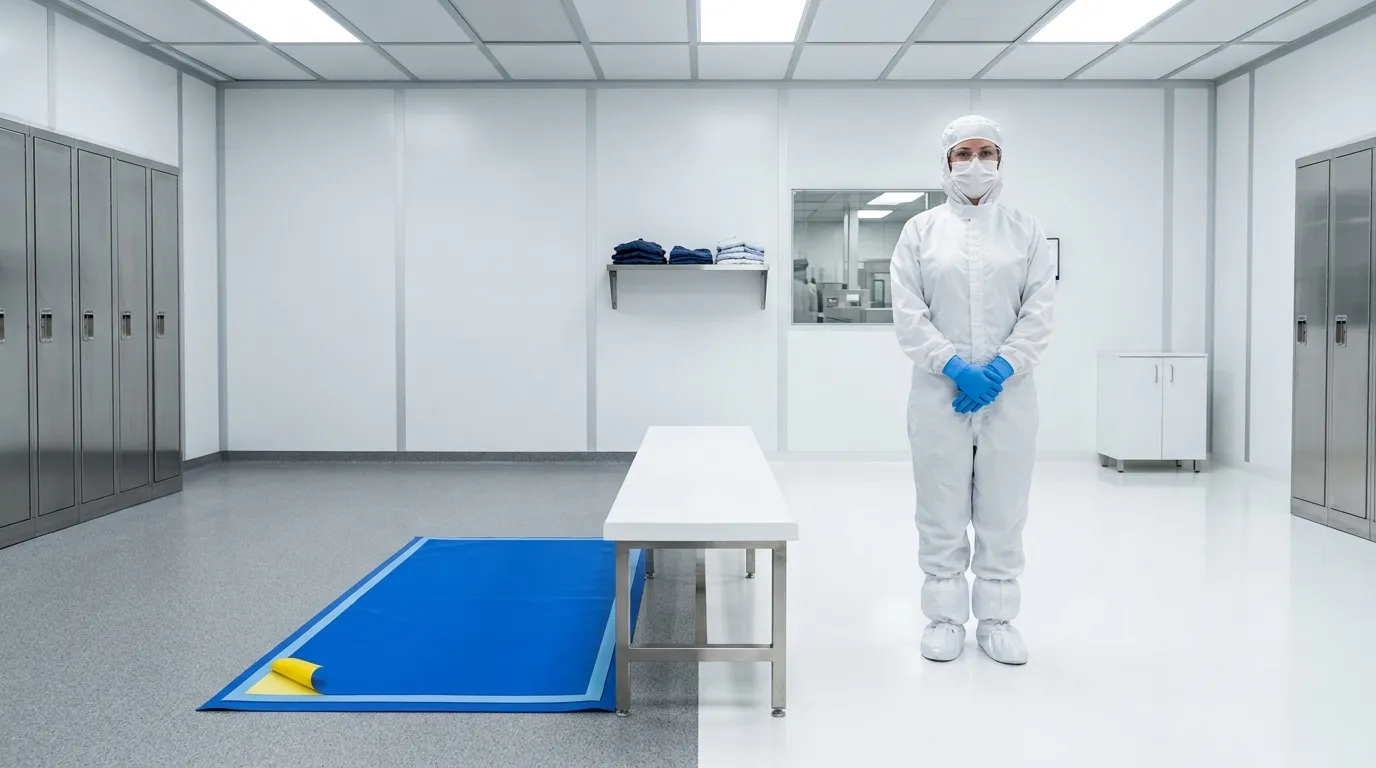
Every gowning room follows one rule: keep dirty surfaces away from clean garments. Learn which parts of the room are dirty — the entrance side, the floor, door handles, personal belongings — and which are clean: benches, storage racks, and garments ready for use.
After you put on gloves, do not touch your face, hair, the floor, walls, or another person's garments or equipment. If you touch a dirty surface, stop and follow the facility's corrective procedure, which usually means sanitizing or replacing your gloves. The gowning procedure is not complete until you cross into the cleanroom without a break in technique.
Final Checks Before Entering the Cleanroom
Before opening the cleanroom door, run a quick visual check:
- No exposed hair or skin.
- Mask covers the nose and mouth.
- Hood sits correctly and tucks into the coverall.
- Coverall closures are secure.
- Shoe covers are intact.
- Gloves are undamaged and correctly fitted.
Use a mirror or a buddy check where the facility provides one. If you find a problem, correct it before entering. If a garment is contaminated or damaged, re-gown rather than carry contamination into the cleanroom.
Common Cleanroom Gowning Failures and How to Correct Them
Even trained operators make mistakes. The table below shows common gowning failures, the contamination risk they create, and the corrective action to take.
| Failure | Why It Matters | Corrective Action |
|---|---|---|
| Coverall touches the floor | Picks up particles and soil from the dirty zone | Inspect; replace the coverall if contaminated or damaged |
| Gloved hand touches a dirty surface, face, or hair | Breaks the final hand barrier | Stop; change gloves and sanitize per SOP |
| Hair or facial hair exposed | Allows particle shedding from skin and hair | Adjust or replace the hair/beard cover before entering |
| Mask not sealed over nose and mouth | Releases droplets and breath particles | Refit the mask; replace it if damaged |
| Shoe cover slips or tears | Footwear can carry contamination into the cleanroom | Replace the shoe cover before continuing |
| Glove torn or punctured | Removes the final barrier around the hands | Replace gloves immediately |
| Operator crosses back to the dirty side during gowning | Invalidates the gowning sequence | Re-gown from the affected step or start over per SOP |
| Damaged coverall used without inspection | Garment cannot provide a reliable barrier | Discard or replace the coverall |
If you are unsure whether a step was performed correctly, treat the situation as a failure. Replace the affected garment, re-gown, or call a supervisor. It is safer to spend a few extra minutes than to enter the cleanroom with an uncertain gowning sequence.
Adapting the Procedure to Your Cleanroom: ISO Class, Sterile Areas, and Facility SOPs
No universal garment list or gowning order fits every cleanroom. The facility's SOP, ISO cleanroom classification, product type, and regulatory context determine the final requirements. A generic online procedure is only a starting point. Review it against:
- The cleanroom's ISO classification (for example, ISO Class 5 vs. ISO Class 8).
- The applicable regulatory framework (for example, EU GMP Annex 1 for sterile pharmaceutical production).
- Whether the process is sterile or non-sterile.
- The specific garment system in use.
- The facility's validated gowning procedure and training records.
Before changing your gowning sequence, review the proposed steps with quality and EHS personnel and update the site SOP.
Sterile versus Non-Sterile Gowning
In a non-sterile cleanroom, gowning focuses on particle control: covering hair, skin, and street clothing to keep particles out of the area. In a sterile or aseptic environment, gowning must also protect the product from microbial contamination. Sterile operations typically require sterile garments, sterile or disinfected gloves, stricter gowning technique, and documented personnel qualification. The gowning order may also change to protect the sterility of the garments.
Visitors, Contractors, and ESD-Sensitive Areas
Visitors and contractors may not need full operator-level gowning, but they must still follow the facility's entry rules. If the cleanroom processes static-sensitive components, anti static apparel may be required. Visitor-specific requirements are described in the cleanroom entry protocol for visitors and contractors; confirm garment and ESD requirements with the facility before entry.
De-Gowning and Exiting the Cleanroom
Leaving a cleanroom also follows a controlled procedure. Remove garments in the order specified by the facility SOP, avoid touching the outside of contaminated garments with bare skin, and place disposable items in the designated waste or laundry containers. Clean your hands after removing gloves. Proper de-gowning protects the gowning area for the next user and prevents contamination from leaving the cleanroom.
Gowning Training, Documentation, and Supporting Supplies
A written gowning procedure is only effective if operators can perform it consistently. Train operators on the sequence, observe them while they gown, and requalify them on the schedule defined by the facility. Keep training records, deviations, and corrective actions on file.
Supporting supplies — cleanroom gloves, sticky mats, and anti-static garments — should match the facility's procedure and cleanroom class. When comparing cleanroom gloves supplier options, ask for specifications that match the glove step in your SOP and for the documentation you need, such as a TDS or batch test report. For entry-area contamination control, review sticky mat for cleanroom entrance options to keep the gowning area stocked with compatible controls.
If you are updating your cleanroom entry supplies, start with your current gowning SOP, confirm the garment and glove requirements for each cleanroom class, and then compare supplier documentation against those needs.
NEWS
GET SERVICE
With quality parts to meet every budget and friendly staff trained to make your visit informative and hassle free.