Cleanroom Cleaning Validation Procedure: Prove It Works

Cleanroom Cleaning Validation Procedure: Prove It Works
Cleanroom cleaning validation is a documented, risk-based study that proves a specified cleaning or disinfection procedure consistently removes or controls identified contaminants on defined surfaces under specified conditions, using pre-established sampling methods and acceptance criteria. In short: it proves that cleanroom cleaning actually works. It is not the same as validating the HVAC system, airflow, or ISO classification of the room — those activities answer different questions. Validation answers one specific question: does this documented cleaning procedure, performed by trained personnel, reliably bring the room's surfaces to an acceptable state of cleanliness?
Cleanroom managers and quality professionals use this procedure when they need documented evidence for an auditor, a regulator, or an internal quality system. The steps below walk through the validation lifecycle from protocol to revalidation, with the critical caveats that keep a study defensible. The room's ISO class, defined by ISO 14644 cleanroom standards, describes the environmental cleanliness target; a cleaning validation study proves that the cleaning procedure supports that target.
What Is Cleanroom Cleaning Validation?
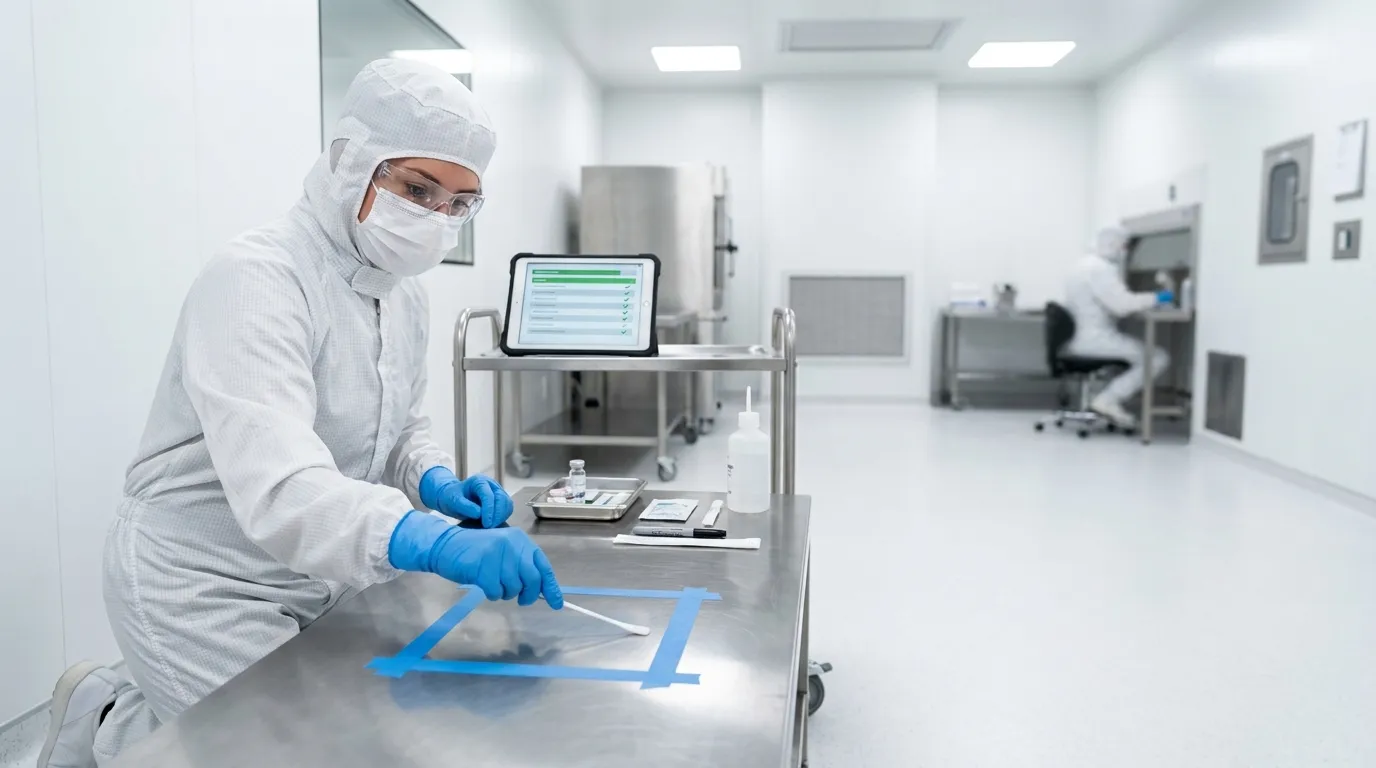
Cleaning validation evaluates a documented cleaning procedure under controlled conditions. It determines, with evidence, whether the procedure reproducibly removes the contaminants that matter for the specific cleanroom: particles, microbial contamination, chemical residues from either the process or the cleaning agents themselves, or some combination of these.
Validation differs from several adjacent activities, and confusing them is the most common source of protocol errors:
| Activity | Question it answers | When you perform it | Typical evidence |
|---|---|---|---|
| Cleaning validation | Does the documented cleaning procedure consistently remove identified contaminants from defined surfaces? | Before relying on a procedure; after meaningful changes | Protocol, sampling results, recovery data, acceptance criteria, approval report |
| Cleaning verification | Did cleaning work on this occasion? | Routine operations | Swab or contact-plate results, visual checks |
| Environmental monitoring | Is the room remaining in a controlled state? | Continuously or on a scheduled basis | Airborne particle counts, viable microbial counts, surface trend data |
| Cleanroom qualification | Does the facility (HVAC, HEPA, pressure, temperature, humidity) perform as designed? | Before commissioning; periodically; after major facility changes | Airflow studies, HEPA integrity tests, particle counts, pressure differentials |
The U.S. FDA describes cleanroom qualification evidence as including airflow studies, HEPA filter integrity, non-viable particle testing, pressure differentials, temperature, and humidity — a different evidence set from a cleaning validation study. FDA guidance on cleaning-process validation also expects firms to prepare written validation protocols in advance and to document results.
Visual inspection alone is not validation. A visually clean surface may still carry residues or microorganisms below the detection threshold of the eye. Validation adds measurable evidence to the visual check. The validation study is one component of the broader cleanroom contamination control program a facility must maintain.
How to Build a Cleanroom Cleaning Validation Protocol
A cleaning validation protocol is the written plan you execute before you touch a surface with a swab or contact plate. It must be prepared and approved in advance, and it must define the study completely enough that a second person could repeat it from the document alone.
FDA guidance on validation of cleaning processes states that firms should prepare written validation protocols in advance, including sampling procedures and analytical methods, and perform validation studies according to those protocols. A protocol that is drafted after results exist, or that changes when results look unfavourable, is not defensible.
A complete protocol includes at least these elements:
| Protocol element | What it must define |
|---|---|
| Scope and objective | Which room, zone, or equipment is covered; what contamination is targeted |
| Responsibilities | Who prepares, executes, samples, tests, reviews, and approves the study |
| Room/equipment identification | Exact surfaces, materials of construction, and access conditions |
| Cleaning procedure | The full written procedure: steps, sequence, clean-to-dirty direction, dilution, application method, contact time |
| Cleaning agents and tools | Named agents, concentrations, wipes, mops, brushes, or other tools |
| Operating conditions | At-rest or operational state, temperature, humidity, staffing |
| Sampling plan | Locations, sample size, sampling area, number of replicates, rationale |
| Analytical methods | Test method, laboratory, reference standard, LOD/LOQ, recovery procedure |
| Recovery and controls | How recovery is demonstrated; positive/negative controls |
| Acceptance criteria | Predefined pass/fail limits with justification |
| Deviation handling | How deviations are logged, investigated, and dispositioned |
| Report approval | Deliverables, review chain, and approval signatures |
How to Execute the Cleanroom Cleaning Validation Procedure: Step by Step
The execution phase follows a fixed order. Each step depends on the one before it: scope determines where you sample, sampling determines which methods you must qualify, method suitability determines whether the results can be trusted, and acceptance criteria must exist before you run the study.
Step 1 — Define the Validation Scope and Identify Critical Surfaces
Define which room, zone, or equipment the study covers, and state the operating conditions. Then identify the surfaces that matter most for contamination control:
- Critical surfaces: surfaces that could directly contaminate the product, process, or patient (for example, product-contact surfaces, open-container areas, or sterile-worksurface zones).
- High-touch surfaces: surfaces frequently contacted by gloved hands, tools, or equipment (door panels, transfer hatches, equipment handles, work surfaces).
- Worst-case surfaces: surfaces that are hardest to clean or most likely to retain contamination (rough finishes, crevices, vertical surfaces, shaded corners, or sheltered areas behind equipment).
Select representative and worst-case locations, and record the rationale in the protocol. A sampling plan built on "easiest to reach" locations is a common source of audit findings.
Step 2 — Document the Cleaning Procedure, Agents and Tools
The validated procedure is the documented procedure. If the actual procedure differs in any meaningful way from what is written — a different agent concentration, a shorter contact time, a different tool — the validation does not cover it, and revalidation may be required.
Document the procedure exactly as performed: the sequence of steps, the clean-to-dirty direction, the dilution and preparation of cleaning agents, the contact time (the time the agent must remain on the surface to be effective), and the tools used, such as wipes, mops, and brushes. Confirm that the agents are compatible with the surfaces and do not leave residues that create a new contamination risk. Disinfection has a different objective from cleaning — cleaning removes soil and residues, while disinfection reduces viable microorganisms — and both may need to be validated, depending on the cleanroom's requirements. When the procedure calls for specific cleanroom cleaning supplies, each consumable must be named and its suitability documented.
Step 3 — Select Sampling Locations and Sampling Methods
A sampling plan converts the critical-surface list into a concrete evidence collection scheme. The method must match both the surface type and the contaminant you are targeting. No single sampling method is right for every validation.
| Sampling method | Best used for | Important limitations |
|---|---|---|
| Surface swab | Defined areas, irregular or curved surfaces; residues and microorganisms | Recovery varies by surface and contaminant; requires recovery study |
| Contact plate | Flat, accessible surfaces; microbial recovery | Not suitable for irregular surfaces; overgrowth can obscure counting |
| Surface particle testing | Particulate contamination on surfaces | Measures particles, not chemical or microbial state |
| Chemical-residue testing | Cleaning-agent residues or product residues | Requires a validated analytical method with appropriate sensitivity |
| ATP testing | Rapid screening indicator of organic residue | Not a universal or regulatory substitute for microbial or chemical testing |
Airborne particle monitoring is not a substitute for surface sampling. A particle counter measures the air, not the state of the surfaces. Airborne particle data belongs to environmental monitoring and facility qualification; it does not prove that a surface was cleaned.
Step 4 — Verify Recovery and Analytical Method Suitability
A sampling method is only as good as its ability to detect the contaminant on the actual surface. A recovery study demonstrates this: apply a known amount of the target contaminant to a coupon of the same surface material, perform the sampling method, and measure how much is recovered. Document the recovery percentage, and use it to interpret the results.
The analytical method must also be fit for purpose. For chemical-residue testing, the method must demonstrate appropriate sensitivity, with a limit of detection (LOD) and limit of quantitation (LOQ) below the acceptance limit. If the analytical method cannot measure at the level you need, the study cannot support the acceptance criteria.
Where disinfectants are used, residual disinfectant on the surface can suppress microbial recovery in swab and contact-plate samples, producing false-negative results. The protocol must address this with validated neutralizers or an equivalent control step.
For environments where biocontamination control is formally assessed, ISO 14698 provides methodology context. Note that the 2003 edition is listed as withdrawn by ISO, so verify the current applicable standard or replacement before citing it in a protocol.
Step 5 — Set Acceptance Criteria Before Execution
Acceptance criteria define whether the cleaning procedure passed or failed, and they must be written into the protocol before results exist. Criteria must be scientifically justified for the specific process, product, and regulatory context. There is no universal microbial, particle, ATP, or residue limit that applies to every cleanroom.
A defensible criteria table might cover:
| Category | Example criterion (illustrative only) |
|---|---|
| Visual | No visible residue on the sampled surface |
| Chemical | Residue below the verified analytical LOQ, or below a product-specific limit |
| Microbial | Within the site's validated contamination-control limits for the room class |
| Particulate | Surface particle level within the site's defined tolerance |
The limits in this table are illustrative. The actual values must come from your process, your product, the applicable regulatory framework (such as GMP requirements where they apply), and your contamination-control data. The room's ISO 14644 class informs the contamination target but does not by itself set a cleaning acceptance limit. The cleanroom classification chart particle limits describe the environmental particle targets for the room class; the cleaning acceptance values are a separate, protocol-defined decision.
Step 6 — Run the Study, Document Results and Handle Deviations
Execute the procedure exactly as written in the protocol. Record all results, including environmental conditions and any observations that could affect the interpretation of the data.
If anything deviates from the protocol — a different operator, an unusual delay, a change in room conditions — log the deviation, investigate its root cause, and document its impact on the validity of the study. Out-of-limit results trigger a formal investigation and corrective and preventive action (CAPA). They do not justify retroactively changing the acceptance criteria.
The number of successful runs needed is a protocol decision based on risk, not a fixed universal number. The study design, including the number of runs, must be justified in the protocol and approved before execution. Protocol elements such as sampling procedures and analytical methods are also covered in training material used by WHO and should be adapted to the facility's own risk assessment and regulatory context.
Step 7 — Approve the Report, Monitor Routinely and Schedule Revalidation
The validation report closes the study: it presents the results, the deviations, the conclusions, and the approval signatures. After approval, the validated cleaning procedure becomes the controlled procedure for routine operations.
Routine environmental monitoring continues after validation. Monitoring tracks the ongoing state of the room and can detect trends, but it does not replace the initial validation study.
Revalidation is required when something meaningful changes:
- A change to the cleaning procedure, agents, concentration, or contact time.
- A change to equipment, surfaces, or room configuration.
- A change in the product or process that alters the contamination risk.
- Adverse monitoring trends or failed routine results.
- A significant change in personnel or training that affects procedure execution.
What Documentation Should a Cleaning-Consumables Supplier Provide?
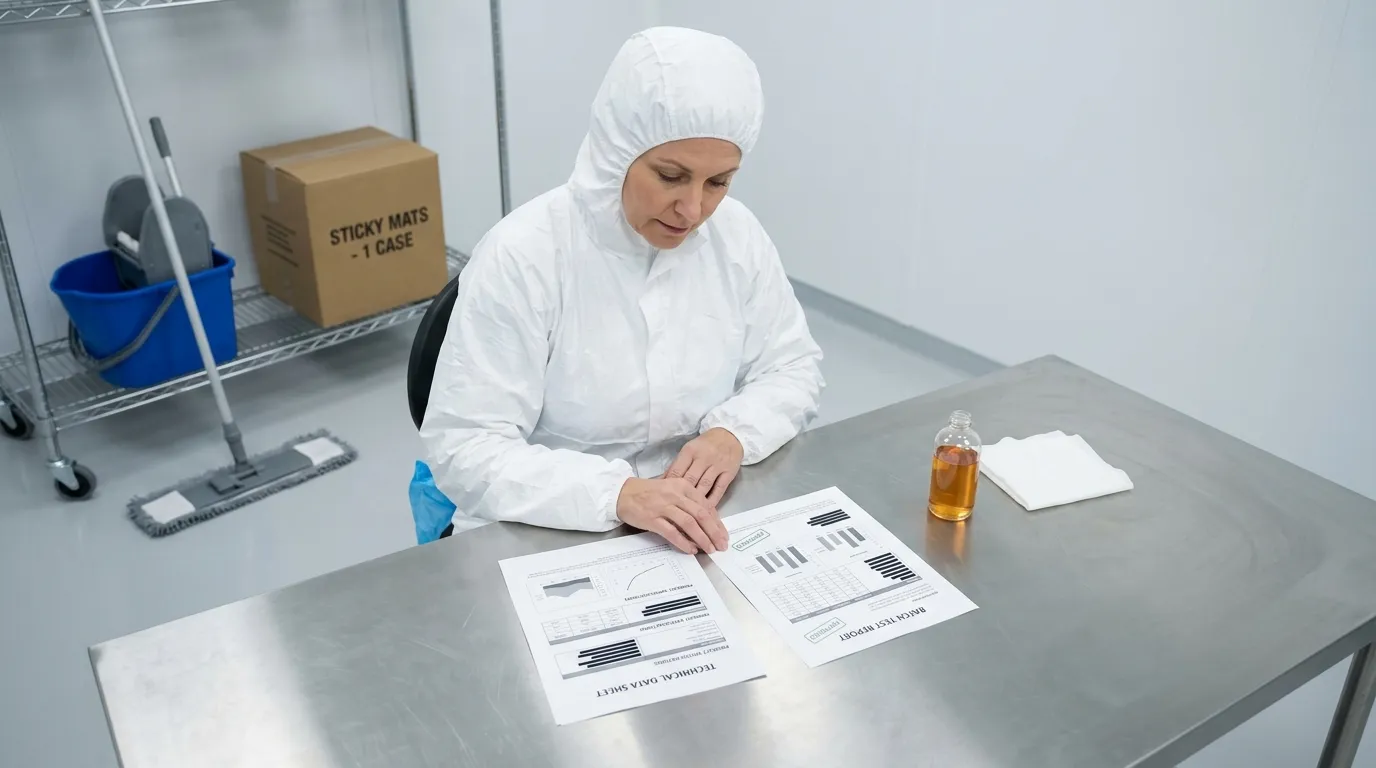
Cleaning validation requires you to name and control the tools and consumables in the procedure. When you evaluate cleaning supplies, the supplier's documentation matters — but different documents prove different things, and none of them proves your cleaning procedure is validated.
| Document | What it tells you | What it does not prove |
|---|---|---|
| Technical Data Sheet (TDS) | Product attributes: material, dimensions, handling, general performance | That the product is validated for your cleanroom |
| Safety Data Sheet (SDS/MSDS) | Safe handling, storage, and emergency information | Cleaning efficacy or compliance with your acceptance criteria |
| Batch test report | Measured values for a specific batch or model, tested by a named method | That every batch will perform identically forever |
| Certificate | A named requirement, issuing body, certificate number, and covered product/model | Site-specific validation of your cleaning procedure |
A supplier's statement that buyers should "look for" ISO, GMP, or UL compliance is guidance to you, not proof that the supplier holds those credentials. Ask for the actual document, and verify the issuing body, certificate number, and covered product.
None of these documents replaces site-specific cleaning validation. The validation study is performed in your cleanroom, on your surfaces, with your procedures and your operators. A supplier can support your study with verified product documentation, but it cannot perform the validation for you.
When you are ready to select cleaning supplies for a validated procedure, compare options against the documentation requirements above. Nabai, a cleanroom-consumables manufacturer, provides a range of cleaning supplies on its product pages. Evaluate any consumable against the cleaning procedure requirements in your protocol and request the applicable documentation before approval.
Common Mistakes That Invalidate a Cleanroom Cleaning Validation Study
Validation studies fail for predictable reasons. Most of these are preventable:
- Treating visual cleanliness as proof. The eye cannot detect residues below its threshold. Add measurable sampling.
- Choosing the sampling method before defining the contaminant and surface. A swab, a contact plate, and a particle method answer different questions.
- Skipping recovery studies. Without recovery data, you cannot interpret a negative result as "nothing present."
- Setting acceptance criteria after seeing results. This is a protocol violation and an audit finding.
- Using acceptance limits without justification. "Industry standard" is not a justification unless you can identify the source and the basis for applying it to your process.
- Believing an ingress-control product replaces procedure validation. A sticky mat at the cleanroom entrance, for example, controls tracked-in contamination at the door — it does not prove that the room's cleaning procedure works. The same applies to any consumable claim: the product performs its function; the validation study proves the procedure.
- Failing to document deviations. An undocumented deviation makes the entire run questionable.
- Forgetting revalidation triggers. A changed procedure, agent, or room configuration silently invalidates the original study.
- Assuming routine monitoring replaces initial validation. Monitoring detects drift; it does not establish initial proof. Supporting tactics for particulate control are covered separately in how to reduce dust contamination in cleanrooms.
The cleanroom cleaning validation procedure exists to give you that proof: a documented, risk-based study that shows your procedure consistently achieves the cleanliness your cleanroom requires. Define the scope, document the procedure, choose the right sampling methods, verify that your methods can detect what matters, set justified acceptance criteria before you start, and carry the results through approval, routine monitoring, and scheduled revalidation. That evidence is what makes a cleaning program defensible — to auditors, regulators, and your own quality system.
NEWS
GET SERVICE
With quality parts to meet every budget and friendly staff trained to make your visit informative and hassle free.